Logo

Winter Wonderland

Posted by Jordan | Sunday, December 21, 2008 | , | 1 comments »

(I wonder if there are any birds in there? Probably not.)
In the past few weeks it has been snowing a lot here in Minnesota, with each storm producing 6-12 inches per storm. This has been causing travel problems or delays for us since we like to travel around to visit with relatives or go back home and such, and this heavy snow along with wind and ice create rather treacherous traveling conditions. To make things more wonderful for any living creature outside is the fact that the temperature is below zero and the windchill has been somewhere between 20 and 40 below. Fun fun.

The weather has also been affecting the watering schedule for the plants since we have had to spend more time driving, shoveling, shopping for the holidays, and keeping the house clean and everything, so hopefully we won't lose too many plants as a result. The only plant that has gotten to dry so far is our newest Poinsettia (Euphorbia pulcherrima) which I had thought I had watered enough and which I thought was getting enough light, but I was apparently wrong with that assumption.

In other news the annual plants that were never thrown out at the end of the season continue to get more and more snow on them.

I cannot wait until winter is over.

Fittonia Propagation Project Update

Posted by Jordan | Tuesday, December 16, 2008 | , , | 1 comments »

Fittonia Cutting Growing WellI have not been able to post that much recently due to being busy at work, with Christmas shopping, and also due to the fact that Annah and I do not have internet at home, so I thought I would at least try to write up a quick post to keep this site going!

As of today, December 16th, my fittonia propagation project has been working well. I have continued to water the cuttings and mist them every four to five days. Both of the cuttings seem to be doing well and I will have to figure out one of these days how long I will keep them growing inside their humid ziploc bag. Perhaps a few more weeks will suffice, but I will probably have to do more research to determine whether or not it should be longer.


One of the cuttings has produced some aerial roots which are growing down toward the soil. I'm not sure if this is going to be problematic or not, but we shall see. I probably did not cut the cutting short enough or perhaps I did not place it far enough in the soil.

Anyway, that's the update on the fittonia cuttings for now. Look forward to a new post within the next couple of days!

Pothos Cuttings For Our Terrarium

Posted by Jordan | Saturday, December 06, 2008 | , , | 1 comments »


Last week Annah and I decided that we were going to purchase two anole lizards to have as pets. Our Hermit Crabs are still alive and doing well, but they are usually more active at night or burried beneath the sand while molting, so they are not the most exciting animals to own, even though they can last a long time in captivity.

When I was growing up I had some anole lizards and still had some of the supplies to use for them such as a terrarium, heat rock, and a lid with lights. However, once everything was set up in the terrarium, it seemed like it was missing something and the anoles did not seem as happy as they could be. So, after doing some reading in an anole book we had purchased, we decided to set up a little mason jar with pothos cuttings and water and see if that would work. After drilling some holes in the lid for the jar, I filled up the mason jar with water, placed the pothos cuttings in, and placed it into the terrarium. I then put some of the substrate for the terrarium on the lid of the jar to make it look a little more natural.

So far the cuttings seem to be doing well and the anoles seem to be happier since they now have a place to hide and the pothos also allows them to drink droplets of water off the pothos leaves.

If this idea does not work I think we will try planting a pothos directly into soil in the terrarium, but for now we will keep our fingers crossed that this idea will succeed!

China Doll Plant: Mealybug Alert!

Posted by Jordan | Friday, December 05, 2008 | , , | 5 comments »

(The first sign of mealybugs on November 14th. The small mealybug pests are bright write, small, and hard to get in focus with my digital camera.)

The China Doll Plant or Radermachia sinica that I had purchased for $1.25 in the middle of September to grow at my office (read about it here as well as in a later post) has unfortunately become the breeding ground for what appears to be mealybugs. This is the first work plant to be killed off by a pest.

I had noticed that the plant had a few mealybugs on it a few weeks ago and decided that the plant was a lost cause so I placed it in a different room to be quarantined so that I could eventually throw it into the trash. However, I got busy with work, then Thanksgiving came along, so yesterday I remembered that I needed to throw the plant away.

(December 5th: The mealybugs are now larger and covered with a hard outer shell. Click on the photo for a larger, more detailed view.)

In the meantime, at our work we have a cleaning lady that comes once a week who also seems to like plants but she does not speak that much English so I cannot really talk about plants with her. Anyway, the other day I noticed her leaving the room where the China Doll plant was left to die, as well another small empty office near that which also has a few of my plants, and what she had an empty bottle in her hand. What could she have been doing with that, I thought to myself. Sure enough, I went and checked on the plants when she left and noticed that she had watered all of them, even though I had just watered most of them the Wednesday before Thanksgiving and then the others on Monday. If I had not noticed that she had watered them again that day, I would have over-watered them since it was not in my normal watering schedule and they were still wet about a quarter-of-an-inch down.

All of my other plants which are not infested with mealybugs or other pests are doing great and do not need to be over-watered. From now on I will try to make sure all of the watering of my plants is done by me!

Regardless, I did not want to take the time to try to nurse the China Doll plant back to full health so it has been discarded. Additionally, the plant which was growing next to it for several weeks, the Chrysalidocarpus lutescens (Areca Palm) was not doing the best either and was thrown away.

Project: Fittonia Propagation

Posted by Jordan | Wednesday, November 26, 2008 | , , | 15 comments »

Propagating Fittonia While I was at work on November 12th, I decided that it was time to try propagating my pink Fittonia (Fittonia argyroneura) because it was starting to get a little out of control, so I gathered up all of the tools I needed and started with the project.

The tools I used were:

After doing some research, I found that one of the easiest methods for fittonia propagation is by using stem cuttings. I used the bonsai trimming shears to cut the fittonia stems, selecting stems with 4 to 5 leaves. I put some houseplant soil into the two plastic cups I had, placed the cut stems about an inch down into the soil, and then packed the soil around the base of the stem. I then watered the cuttings, placed them into a plastic ziploc bag, and then sprayed them with water. The last step in the process was to blow air into the bag to expand it so that the plants had room to grow. Once the air was blown into the bags they were closed and the bags were placed on the top of a storage cabinet, which is about a foot below the fluorescent lighting fixture.

Propagating FittoniaEvery couple of days I spray more water, blow air into the bag, and reseal it. So far this has been working well and the cuttings appear to be growing.

There will be a status update in the future to check on the progress of the cuttings.

Schlumbergera truncataIf you have been reading this blog since last winter you will be happy to know that the Schlumbergera truncata (or Thanksgiving Cactus/Holiday Cactus) that I rooted and planted in a plastic cup -- (Read about it here and then in a subsequent post) -- is doing well and is currently flowering.


The Beginning of the Project: January 2008

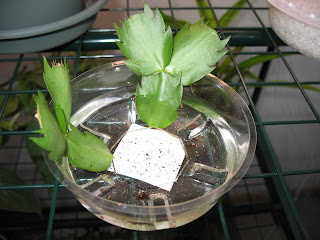
In order to demonstrate how far this plant has progressed since I started this project in January, here are the photos from when I first started this project:


The cuttings were planted in their own plastic cup "pot" in the end of February. They survived the move to the house Annah and I are renting and have been growing in their new location since the middle of August.

The First Flower:

The cooler temperatures in last month or two have done wonders for all of the Schlumbergera truncata's (Thanksgiving Cacti) at our house and this is only the first of many blooms at our house. (The pictures below are close-ups of the flower shown at the top of this post)

Schlumbergera truncata
This is the second Schlumbergera truncata post in recent weeks and will surely not be the last. Look forward for more to come in the upcoming weeks! Don't worry though, I will be posting about other houseplants/flowers besides Schlumbergera truncata's!